My Photos

Showing posts with label Winter. Show all posts

Monday, December 5, 2011

Christmas Bird

I was going over some sketches that I keep in my sketch book and found this one. I liked the layout of it and thought it was the perfect sketch for combining different embossing folders. On this card I used the new Snow Burst folder and Northern Flurry. On the upper left corner I embossed just a couple of snowflakes from Northern Flurry and then on the lower right side, I used Snow Burst. 
 I made a little pine cone to tuck under my paper bow, along with some pine greenery. The paper bow is made from a piece of Frostwood Lodge DSP. LOVE that Designer Series Paper!!!! I added some Dazzling Details for the glittery snow on the pine branches and the pine cone.
 My buttons are made with the 3/4" Circle punch and the Boho Blossoms punch. Just punch out a circle and a blossom, layer, and punch the button holes. I use a clear button that I die cut from my Buttons #5 Sizzlet. I lay my button hole template on my circle or flower, center it, mark the holes and punch with a 1/16" circle punch.
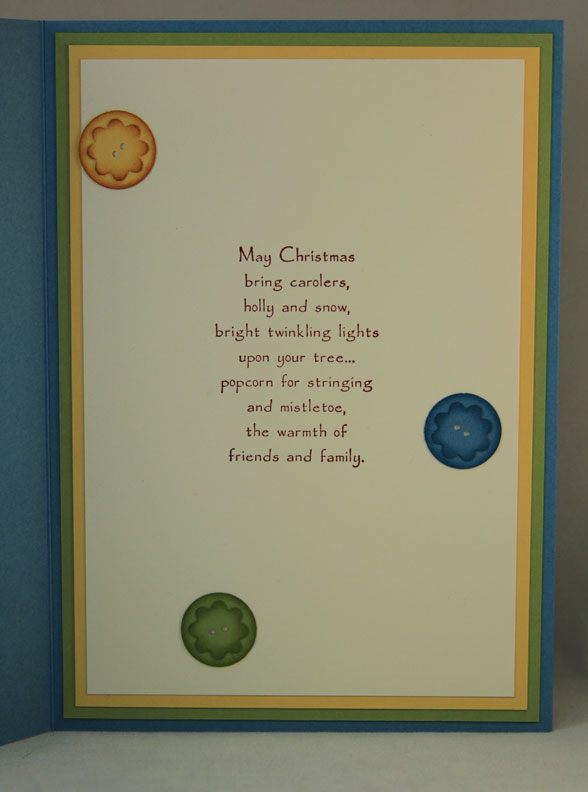
 On the inside, I added a couple of patches of 'flannel' paper from Frostwood Lodge. I punched them with the postage stamp punch and added another button that I made with punches.
 The Marina Mist button below looks like the center is layered on top in the photo (just noticed that), but it's not. I punched a 1/2" circle and then centered it in my 3/4" Circle punch and punched. I punched a whole 3/4" circle and inked up the inside edges of the 1/2" circle. Adhered the two circles together and inked around the edges of the button again with Marina Mist. The Cherry Cobbler button is die cut from Buttons #5.
Have a wonderful day today and thanks for visiting me here!!

Blessings!
Barb

Supplies:
Paper: Marina Mist, Whisper White, Old Olive, Cherry Cobbler, Chocolate Chip, Frostwood Lodge Designer Series Paper
Stamps: 
Classic Stampin' Ink: Cherry Cobbler, Marina Mist, Chocolate Chip, Whisper White (Craft Ink)
Punches: Scalloped Oval, Builder Bird, 3/4" Circle, 1/2" Circle, Boho Blossoms, Postage Stamp
Dies: Buttons #5
Other: Northern Frost and Snow Burst embossing folders, Stampin' Dimensionals, Dazzling Details glitter glue, white crochet thread, white gel pen


Tuesday, November 15, 2011

A Sweet Gift Box

As a demonstrator, I have access to a lot of wonderful ideas and projects, not only through Stampin' Connection (an online community for demonstrators only), but also through the Stampin' Up! site for demonstrators. We have access to online videos showing projects made with Stampin' Up! products. The gift box below was one of the video projects. I used different stamps to make mine and different ribbon and a different tag, but the box idea came from Stampin' Up! To make the box itself, you simply die cut two Fancy Favor boxes, stamp them, and then slip one box into the other. The result is a box that is closed on both ends, but easy to open :). 
For my box I used Real Red, Very Vanilla, and Always Artichoke. Those are great colors to use for Christmas projects! My tag is made with the Ovals die and the Designer Frames embossing folders. I used the medium oval for the tag and embossed it inside the Designer Frames folder. For the center of the tag, I die cut the smallest oval and embossed it with the Square Lattice embossing folder. I finished off the tag with a stamped image from Winter Post. Adhere some seam binding ribbon and add a bow and you have a pretty box for a gift or for special treats. I may add home baked Christmas cookies to mine- this is ideal packaging for a few Christmas cookies :). I hope your day is wonderful today! See you tomorrow!

Blessings!
Barb

Supplies:
Paper: Real Red, Very Vanilla, Always Artichoke
Classic Stampin' Ink: Cherry Cobbler, Soft Suede, Always Artichoke
Stamps: Winter Post
Dies: Fancy Favor, Ovals
Embossing Folders: Designer Frames, Square Lattice
Other: Always Artichoke Seam Binding ribbon, gold crochet thread, 1/8 Circle punch

Friday, November 11, 2011

Polar Party

This is a very 'non-traditional color' Christmas card. I used Melon Mambo and Pacific Point along with Very Vanilla. I also had a difficult time photographing this one! Please forgive the photos, and hopefully you can get the idea of how this card looks in real life :). The trees and the penguins with their stacks of gifts were stamped on watercolor paper with StazOn Jet Black ink. You will want to use a permanent ink instead of a dye based ink for water coloring. I used my Watercolor Wonder Crayons and a blender pen to color my images. There is actually a lot of sparkle on this card. I used Dazzling Details to highlight the snow and the Christmas Trees and the snowflakes are die cut from white glitter paper. I love these little penguins- they are just soooooo cute!!!!!
 
For the inside of this card, I layered two snowflakes and both are die cut from more glitter paper. I used a scrap that I had leftover from my card front to 'hang' the snowflake from :). The Northern Frost snowflakes are so pretty and detailed and they layer together beautifully! 

It's getting colder where I live- brrrr! Dropping down into the low 30's at night. The leaves are almost completely off the trees now too. Time for the land to rest until Spring :). I hope you all have a wonderful autumn weekend!

Blessings!
Barb

Supplies:
Paper: Melon Mambo, Pacific Point, Very Vanilla, watercolor paper, glitter paper
Stamps: Polar Party, inside sentiment from a retired set
Classic Stampin' Ink: Melon Mambo, Pacific Point
Other Ink" StazOn Jet Black
Dies: Northern Frost
Other: Watercolor Wonder Crayons, gems
Textured Impressions Embossing Folders: Snow Burst

Wednesday, November 9, 2011

Snow Much Fun

Did I ever mention that I love snowmen? I have a whole section of my home dedicated to snowmen when I decorate for Christmas :). What's not to love about snowmen? I love the snowman images in Snow Much Fun, so I pulled that set out last night and water colored it with my Watercolor Wonder Crayons and my blender pens. I love to water color! It's so relaxing! There is a lot of sparkle on this card, but unfortunately, the camera didn't pick it up when I photographed it (rainy day here so drab and dreary out and no bright sunlight). I added Dazzling Details glitter glue to the snowman and the little Christmas Tree, and of course, to the snow :). The snowflake is die cut from glitter card stock. I stamped a few buttons from the Button, Button stamp set. I punched the center holes of the button with a 1/16" circle punch and the circle punch from Itty Bitty Shapes punch pack.
 I added a few buttons to the inside that I made with punches that were inspired by the Button, Button stamp set. Are these buttons not the cutest thing?!
 To make the button, punch the little flower out from the Boho Blossoms punch, ink around the edge, and then punch a 3/4" circle and ink around the edge again. Glue the flower to the circle. Mark the center to punch the holes (1/16" circle punch) for the button, (I used a stamped button from Button, Button for a template to mark where the holes should go), and viola! Cute buttons!
Have a GREAT day today!!

Blessings!
Barb

Supplies:
Paper: Marina Mist, Pear Pizzazz, So Sffron, Very Vanilla, water color paper, Designer Series Paper Hostess  Pack (retired- but you can purchase the new Pear Pizzazz Designer Series Paper)
Classic Stampin' Ink: Cherry Cobbler, More Mustard, Marina Mist, Pear Pizzazz
Stamps: Snow Much Fun, Button, Button, Teeny Tiny Wishes, inside sentiment from a retired set
Dies: Northern Frost
Punches: Modern Label, Word Window, Itty Bitty Shapes punch pack, 3/4" Circle, Boho Blossoms
Other: Watercolor Wonder Crayons, Dazzling Details glitter glue, Snow Burst embossing folder, Stampin' Dimensionals

Monday, September 12, 2011

Christmas Postage

So, I go from fall projects straight to Christmas... what a jump, huh?! The next two projects were projects that I worked on last week. I meant these for later on and planned to do more autumn projects for posting, but something big came up that we had to take care of on Thursday and then on Friday we left for Chicago to see our daughter's coaches up there for training over the weekend. I hope you don't mind seeing Christmas projects so early :-).

I used three stamp sets: Seasonal Sentiments (retired) Winter Post (main catalog) and Dear Santa (from the Holiday Mini). I also used the fairly new Postage Stamp punch and my favorite snow flakes of all- Northern Frost. The Cherry Cobbler Postage Stamp punch adds a little 'punch' to the color scheme :-). 


It is about time to be working on those Christmas cards and you can see that I have started on mine ;-). Hopefully, I will have them all done by Thanksgiving so all I have to do is stick a postage stamp on them and drop them in the mailbox! Have a wonderful day today and thanks for stopping by!

Blessings!
Barb

Supplies: 
Stamps: Seasonal Sentiments 121130 (retired), Winter Post 111780, Dear Santa 123834
Classic Stampin' Ink: Marina Mist 119668, Early Espresso 119670
Paper: Bashful Blue 105120, Marina Mist 119682, Whisper White 100730, Bashful Blue Designer Series Paper (retired)
Punches: Scallop Edge Border 119882, Scallop Trim Border 118402, Dotted Scallop Ribbon Border 119275, Postage Stamp 122344, 1" Square 124094, Ticket Corner 119867
Dies: Petal Cone 121810, Northern Frost 120901
Other: Textured Impressions Embossing Folder: Stripes 123128, Basic Pearls 119247

Wednesday, January 12, 2011

Winter Layout

I absolutely LOVE winter on the farm!! Our snow always stays white and pretty and the scenery is breathtaking. Whenever we get a good amount of snow, I try to get out and get photos. That's one of the things I love about photography- you have a visual image for as long as your photo lasts :).
The top photo on my page is a picture of my husband's favorite tree. He thinks it's the coolest tree on the whole farm...and we have a LOT of trees around here! The bottom photos are the same post, just from different angles. I really like the way posts look with snow on top of them :). 

I wanted to thank everyone again who left such caring comments about the loss of our kitty Lucky. We are still adjusting to him being gone. I am so very thankful for the power of a camera. Our camera's preserve our most precious memories for us. It was really odd that day that Lucky was so cooperative with my camera. I remember thinking that at least I would have some great photos of him for when he got old and it was his time to go. I had no idea that day that his time would be just a few months later, but maybe he knew and that was why he was so cooperative. I plan to do some layouts of Lucky, but it's just soon yet for me.

I hope you are all having an amazing week so far! We have gotten more snow- as much as in my photos above, so this will be our second official snow of this winter :D. 

Blessings!!!
Barb

Supplies:
My Digital Studio

Wednesday, December 15, 2010

York Peppermint Patty Treats

I think there were many of us papercrafters who were really disappointed when The Hershey Company changed the packaging for York Peppermint Patties. We had this lovely little round peppermint patty covered in a 'fitted' foil wrapper that could be covered with a stamped Scalloped Circle punch for any holiday. I know that there is another company who is sticking with the fitted foil wrapper, but in my opinion, they just don't taste as good as a York (sorry other company) :D. Scallop Envelope die to the rescue!!!! I die cut two Scallop Envelopes in Pink Pirouette and trimmed the very bottom flap of the envelope so that the flap was 1/2" long. Punch a shape out of the top of the envelope for a little handle and glue the sides and the bottoms- viola! It holds two York Peppermint Patties in their 'new' packaging perfectly!


I'll be making these for my daughter to give out to her team mates this year. So glad they don't read my blog :D. Have a great day!!!!

Blessings!
Barb

Supplies:
Card Stock: Pink Pirouette-111351, Very Vanilla-101650
Classic Stampin' Ink: Real Red-103133
Punches: Word Window-119857
Dies: Northern Frost-120901
Other: gold brad-104337

Tuesday, December 14, 2010

Place Setting Card

This one is kind of a re-run. Recently, I posted some place setting cards that I made for my Christmas table. There were two- one with a poinsettia and one with a snowflake. The snowflake one was done in Bashful Blue, Marina Mist, and Very Vanilla. JoAnne's was having a Wilton baking supplies sale last week and I found these cute snowman paper plates with matching napkins. Since our children spend the night on Christmas Eve each year, we always have snacking food out- beef summer sausauge, cheese slices, crackers, veggie trays, punch, home made cookies and candy, etc. To go with the cute paper plates I found, I just changed the color of the name holder on the card :D. Instead of using Bashful Blue, I used Cherry Cobbler instead.
Cherry Cobbler and Marina Mist are an amazing little match for these snowman paper plates. I got the paper plates and napkins for 60% off! :D Aren't they cute?

Have a wonderful day today! I hope you are staying warm and dry!

Blessings!
Barb

Supplies:
Card Stock: Very Vanilla-101650, Whisper White-100730, Cherry Cobbler-119685, Marina Mist-119682
Punches: Modern Label-119849, Word Window-119857
Dies: Northern Frost decorative strip-120901, Table Setting-116819

Friday, December 10, 2010

Candle with Die Cuts

Yesterday, I showed you a stamped image candle. Today, I wanted to show you that you can do the same method of melting images into a candle with die cuts too. I die cut several different sizes of snowflakes from the Northern Frost strip die in the 2010 Holiday mini. The snowflakes on this strip die are GORGEOUS!!!!
To apply the die cuts, you would place your die cuts where you want them to be on the candle and wrap the candle tightly with waxed paper, making sure the waxed paper is smooth. Using your heat tool, quickly and evenly heat the die cut and around its edges. This takes just seconds so be careful not to burn a hole into your candle. Pull the waxed paper gently away from the candle. You will be able to tell if the die cut melted into the candle all the way. If it didn't, just re-place the waxed paper and heat again. After the die cuts are set into the candle, add some stick on rhinestones.

Die cuts on candles are so pretty! I use my candles just for decorating purposes. I wouldn't recommend burning these and if they were lit, I wouldn't burn it past the start of the die cuts or the rhinestones. Once again, the Scallop Circle die makes pretty little candle coasters for displaying the candle :D. Have a holly jolly day today!!!

Blessings!
Barb

Supplies:
Dies: Northern Frost strip- 120901, Scallop Circle- 113468


Thursday, December 9, 2010

Dasher Stamped Candle

I'm feeling better today- so far :-), so I got some photos this morning. I've been working on things for my daughter's skate team Christmas Show raffle. The raffle helps to raise money for the team. I'm showing this kind of backwards today :D. I sewed a bag for the candle on my serger using sparkle tulle that comes on a roll. I topped it with a tag, a poinsettia flower, and tied it with gold crochet thread. The flower is punched from the 5 Petal Flower punch and the petals are curled under slightly with a chop stick. I added a star shaped gold brad to the center and an Old Olive holly leaves die cut (holly leaves not Stampin' Up!).
I LOVE the Dasher stamp!! He is the most elegant reindeer stamp I think I've ever seen. I stamped him on white tissue paper with Cherry Cobbler Classic Stampin' Ink and cut him out close to the image. I placed him on the candle where I wanted him to be and covered him with a sheet of waxed paper. Holding the waxed paper tight and smooth over the image on the candle, I used my heat tool to melt the image and tissue paper into the candle. This takes literally seconds, so if you try this be careful that you don't melt a hole into your candle. Be sure to keep the heat tool moving quickly over the image.

I finished him off by stamping my sentiment on another piece of tissue paper and repeating the process outlined above. I also added some red stick on rhinestones to his antlers. The gold base that my candle is standing on was made with mat board, gold metallic card stock, the Scalloped Circle die, and my Big Shot. These make quick and inexpensive, but lovely gifts, for just about anyone on your shopping list. My tall pillar candles cost about $3.00 each, but if you were to buy a candle with an image on it in the store, you would pay about $10.00 - $12.00 each. Have a wonderful day today!!!

Blessings!
Barb

Supplies:
Stamps: Dasher- 116816, Many Merry Messages- 116586
Classic Stampin' Ink: Cherry Cobbler- 119669
Punches: Extra Large Tag- 119866, 5 Petal Flower- 119880
Dies: Scallop Circle- 113468

Friday, December 3, 2010

Place Setting Cards

I got the Table Setting die when it was on sale during the Online Spectacular. Sooooo glad I got it!!! I made some little place setting cards quick, quick, quick! I die cut the cards, punched some Whisper White with the Word Window punch, used the Modern Label to punch out Garden Green, matted the Word Window, stamped the poinsettia on Very Vanilla, cut it out and popped it on there with a dimensional. Doesn't get much easier than that!!
I also made some with a snowflake from the Northern Frost die, using Marina Mist, Bashful Blue, Whisper White, and Very Vanilla.
And here they are together. These are going to look great on my Christmas table this year! My Christmas dishes have poinsettia's on them and I decorate the dining room with poinsettia's- so these will match perfectly.

It takes just a few minutes- literally- to make a complete set of these place cards. I'm going to work on the napkin rings soon :-D. Have a wonderful weekend and stay warm!!!!!

Blessings!
Barb

Supplies: Please see the post above :-)

Tuesday, June 8, 2010

I know this is Early but.....

This is the time of the year when I start working on the design for my husband's business Christmas cards :-). I thought I would share it since I used the Sunday Sketch posted below. I like the way this one came out so it has a really good chance of being the one I use this year. I finally got to use 'Dasher'! I ordered this stamp last year and never got around to using it because all of my Christmas cards were finished by that time. I will be using him this year though! I LOVE this stamp!

I stamped my Old Olive card stock for the background with the Bella Toile background stamp in Old Olive ink. I trimmed my stamped card stock and cut off the bottom piece first. Then I cut the two top pieces in half. I chose to use the same colors that I used in my sketch in the post below- Old Olive and Elegant Eggplant, but I used Very Vanilla instead of Whisper White.


For the inside of my card, I punched the corners with the 'Scallop Trim' corner punch and added a 'Jumbo Snowflake' accent in Elegant Eggplant. I stamped the smallest circle stamp in 'Circle Circus' on Very Vanilla in Old Olive ink and punched it out with the new circle punch from the 'Itty Bitty Shapes Punch Pack'. The circle punch is a perfect fit for the stamp :-). I added the little stamped image to the center of my snowflake and stamped my sentiment in Elegant Eggplant.

I tried several times yesterday morning to get this posted, but Blogger was down for a good part of the day :-(. Glad things are back up and running now! Wishing you all a wonderful day today! Thanks for stopping by. I really appreciate your visits!

Blessings!
Barb

Supplies:
Stamps: Dasher-116816, Teeny Tiny Wishes- 115370, Many Merry Messages- 116586,
Circle Circus- 115778, Bella Toile- 111598
Paper: Old Olive- 100702, Very Vanilla- 101650, Elegant Eggplant- 105126
Classic Stampin' Ink: Old Olive- 102277, Elegant Eggplant- 105210
Punches: Modern Label- 116630, Jumbo Snowflake- 116628, Scallop Trim Corner- 118870, Itty Bitty Shapes Punch Pack- 118309
Dies: Curly Label Movers & Shapers- 114506, Punch Windows- 115953
Other: Gold brads- 104337

Sunday, November 1, 2009

Winter Window

A while back I ordered the Stampin' Up! Movers and Shapers die- love, love, love it! BUT, I wanted to cut out a window that looks like a real window, lol! So, I ordered the four square window die :-). I had in mind a card with a window that you can see through, so I really needed it ;-). And here is the card that I made with my four square die.....


I die the window in the card front first, then I die cut the frame of the window. I used my Eyelet edge punch to create the curtain valance from vellum. The wallpaper was stamped first with Mellow Moss Classic Stampin' ink and then colored in with Stampin' Write markers: Real Red and Old Olive. Now of course, there has to be snow on the windows :-) so I used some clear glue and Dazzling Diamonds. You can click on the photo with your mouse for a larger view of the window so you can see the 'snow' better.

The edges of the window frame are inked with Creamy Caramel and the edges of the card base are inked with Mellow Moss. I added a little holly die cut to the window. As you can tell, you can see the snowmen 'outside' when you look through the window of the card.... and when you open it..............


It's snowing outside!!! Ah, just the weather snowmen love ;-). Wishing you all a wonderful week!

Blessings!
Barb

The supplies I used to make this card are:

Stamps: The More the Merrier, Sprinkles
Card Stock: Mellow Moss, Creamy Caramel, Old Olive, Whisper White, vellum, gold poster board
Classic Stampin' Ink: Real Red, Old Olive, Mellow Moss, Bordering Blue
Stampin' Write Markers: Real Red, Old Olive, More Mustard, Going Gray, Bordering Blue
Punches: Eyelet Edge
Dies: Curly Label Movers and Shapers, Four Square, Beary Merry
Accessories: Dazzling Diamonds
, Gold embossing powder

Thursday, October 29, 2009

Cute Little Snowman :)


Another punch art card- this time a sweet little snowman bringing Christmas greetings :). These little punch art projects are super easy to do. For this card you will need:

Stamps: Best Yet (Hostess Level One- retired) You can use another sentiment
Card Stock: Real Red, Old Olive, Whisper White, Only Orange, Basic Black, Going Gray
Paper: Brocade Blue Designer Series Paper (Hostess Level One- retired) but you could use
Bashful Blue Designer Series Paper
Classic Stampin' Ink: Bashful Blue, Old Olive, Whisper White Craft
Punches: Ornament (Whisper White- head)
3/4" Circle (Whisper White- hands- cut 2)
1/4" Circle (Only Orange- nose)
Small Tag (Basic Black- hat)
Word Window (Basic Black- hat brim)
Tear Drop (Basic Black- eyes)
Dies: Matchbox labels in Real Red and Whisper White
Beary Merry- holly leaves in Old Olive and berries in Real Red
Accessories: Clear glue, Dazzling Diamonds glitter, Regal Rose Stampin' Pastels, Black
Journaler marker, White Gel pen

Cut card base from Real Red 4.25" x 5.50". Layer Old Olive mat ( 4" x 5.25") on card front. Layer the Brocade Blue or Bashful Blue Designer Series Paper (3.75" x 5") on the Old Olive. To create the snowman, punch out the parts listed above in the supplies. Ink the edges of the head and the hands with Bashful Blue. Add a light touch of Regal Rose chalk to create rosy cheeks on the face. Adhere the eyes and the nose, then draw on the mouth. Add some white to the eyes with the white gel pen (refer to photo). With the Whisper White Craft ink lightly brush the edges of the hat pieces on the left side and across the top. Adhere the Small Tag punch hat to the back of the snowman's head. Then adhere the Word Window brim to the front of the hat. I used the Small Tag punch to create the hat band from Going Gray. Line up just about an 1/8" inside the squared part of the Small Tag punch and punch out the hat band. Adhere that above the Word Window brim. Die cut the labels from the Matchbox die. Stamp your sentiment on the Whisper White label in Old Olive and layer/assemble the label. Adhere the snowman head to the card front, then adhere the Matchbox label, then the snowman hands so he is holding his sign. Ink the edges of the Old Olive holly leaves with Old Olive Classic Stampin' ink and adhere the leaves and the berries to the hat band. Add some clear glue to the edges of the hat, hat brim, the side of the snowman face, and on the tops of his hands and sprinkle on some Dazzling Diamonds (click on photo for a larger view to see placement of glitter). You can add a little die cut snowflake as a small embellishment if you would like :). And that's all there is to it! Wasn't that easy?

Hope you all have a wonderful day today! Come back tomorrow for another punch art project :D.

Blessings!
Barb

Wednesday, October 28, 2009

Wedding Samples

My friend Patty is getting married in January! Congrats Patty! Her colors will be red and white. Aren't those great colors for a January wedding? I will be adding some samples for her to see on my blog- I hope you don't mind :D. This first sample is a wedding invitation. It opens at the top, measures 4.25" x 5.50". Card base is Real Red, mat is gold (I used what I had on hand, but if she likes this one I will use Brushed Gold), and the embossed card front is Whisper White. The poinsettia flower is punched with the 5 Petal Flower punch and layered on the Little Leaves Sizzlit die- die cut from Old Olive.


Next I have some samples of wedding favors, all done in Real Red and Whisper White...


Pillow Box die with Tag, Small Tag, and Heart to Heart punches, Real Red 1/4" grograin ribbon.

Some Matchbox samples:


The tags are left blank in the samples, but will contain the happy couple's names and their wedding date :). Let me know what you think Patty and Angela :D. Hugs to you both! Have a great day everyone!!!

Blessings!
Barb

Saturday, October 17, 2009

Build a Bear Polar Bear Christmas Card

For several days I had a polar bear on my mind, so I finally got around to creating him. I just love the Stampin' Up! exclusive Build a Bear dies- they are too cute! Since I had a request for a tutorial for this card, please read below for instructions :).

1. Cut a card base 7" x 10" from Night of Navy and score in the center so that your card base measures 5" x 7" folded. Cut a mat 4.75" x 6.75" from Certainly Celery. Cut Whisper White 4.50" x 6.50".

2. Die cut the polar bear from Very Vanilla and ink the edges of the bear with Bashful Blue Classic Stampin' ink. Ink the edges of the snout with Bashful Blue. Glue a scrap of Basic Black behind the face for the eyes, nose, and mouth. Add a little light blush to the cheeks with Regal Rose chalk. Adhere the snout to the face.

3. Die cut the bear's clothes from Bashful Blue (shoes from Basic Black) and ink the edges with Bashful Blue Classic Stampin' ink. Adhere the cuffs to the lower part of the sleeves on the jacket. Stamp the snowflakes on the bear shirt with Versamark and apply Iridescent Ice embossing powder and heat emboss the snowflakes. Thread gold cord through the holes in the shoes for shoe laces and tie in a bow. Adhere the clothes to the polar bear in the following order: shoes, pants, shirt, jacket.

4. To make the hat, punch out an oval with the Wide Oval punch from Bashful Blue and cut down one end of the oval to fit the bear's head. Hand cut the band of the hat with a scrap from the remaining part of the oval, rounding the ends. Using a stylus, emboss the curved lines in the cuff of the hat. Ink the edges of the hat pieces with Bashful Blue Classic Stampin' ink. Adhere the cuff to the hat and adhere the hat to the bear's head. Punch the small flower from the Boho Blossoms punch and ink the edges with Bashful Blue Classic Stampin' ink.

5. Add flat backed gold pearls to the bear's jacket for buttons and add Dazzling Diamonds to the sleeve cuffs and the pom pom on the hat. Set the bear aside to dry.

6. To create the snowy background scene, tear two pieces of scrap paper into hill shapes and place on the 4.50" x 6.50" Whisper White card stock. Do the right hill first. Ink around the edges of the scrap paper with Bordering Blue Classic Stampin' ink. Repeat with the left hill. Before you remove the masks for creating the two hills, stamp the pine trees with Old Olive Classic Stampin' ink. With a Chocolate Chip Stampin' Write marker, add the trunks to the trees. Remove the masks. Stamp one more pine tree in front of the left hill and add the trunk as you did with the other trees. To add a little more depth to the snowy scene, tear the shape of the right hill from Whisper White card stock. Ink the edges with Bordering Blue Classic Stampin' ink and adhere over the right hill. Next tear a foreground piece from Whisper White, ink the edges with Bordering Blue Classic Stampin' ink and adhere to the bottom of the Whisper White base overlapping the bottom edge of the right hill.

7. Create the sky with a scallop circle punch out and Bashful Blue Classic Stampin' ink. See tutorial for the sky here.

8. Adhere the Certainly Celery mat to the Night of Navy card base. Adhere the Whisper White snowy scene to the Certainly Celery. Add Dazzling Diamonds to the tops of the hills and the top of the foreground snow. Set aside to dry.

9. To create the sled, punch a tag with the Tag punch from Close to Cocoa card stock. Using an embossing stylus, emboss lines in the sled. Ink the edges of the sled with Close to Cocoa Classic Stampin' ink. With the Word Window punch, punch once from Chocolate Chip card stock and once from Going Gray card stock. Cut both Word Window shapes in half lengthwise. Adhere one half of the Chocolate Chip Word Window shape to the top area of the sled. Adhere one half of the Going Gray Word Window shape to each side of the sled, curved edges facing out. With a 1/16" circle punch, punch out two holes in the top of the sled and thread a piece of hemp cord through the holes and tie the ends in knots. This cord is the rope for the sled.

9. When the Dazzling Diamonds on the card base is dry, adhere the polar bear to the snowy scene, making sure that the back of the sled rope is behind the bear's hand (add just a bit of glue to the back of the hand to keep the rope in place). You want the front of the rope to be on the front of the bear's hand. Add some glue to the sled and adhere the sled in position on the card. At this point, you may add some Dazzling Diamonds to the top and left bottom side of the sled for snow.

Please let me know if you have any questions :). Supplies list following post. Have a wonderful week!!!

Blessings!
Barb

Stamps: Lovely As a Tree, Four the Holidays
Classic Stampin' Ink: Bashful Blue, Old Olive, Bordering Blue, Close to Cocoa
Card Stock: Night of Navy, Certainly Celery, Whisper White, Bashful Blue, Very Vanilla, Close to Cocoa, Chocolate Chip, Going Gray, Basic Black
Dies: Stampin' Up! exclusive Build a Bear Bear, Beary Essentials
Punches: Wide Oval, Boho Blossoms, Tag, Word Window
Accessories: Gold flat backed pearls, Iridescent Ice embossing powder, Dazzling Diamonds glitter, gold cord, hemp cord